Google Developer Account - Verification Guide
Things you’ll need:
Driver License and Liquor License
DUNS Number (if you don’t know it, you can find it HERE)
Steps to verify your account
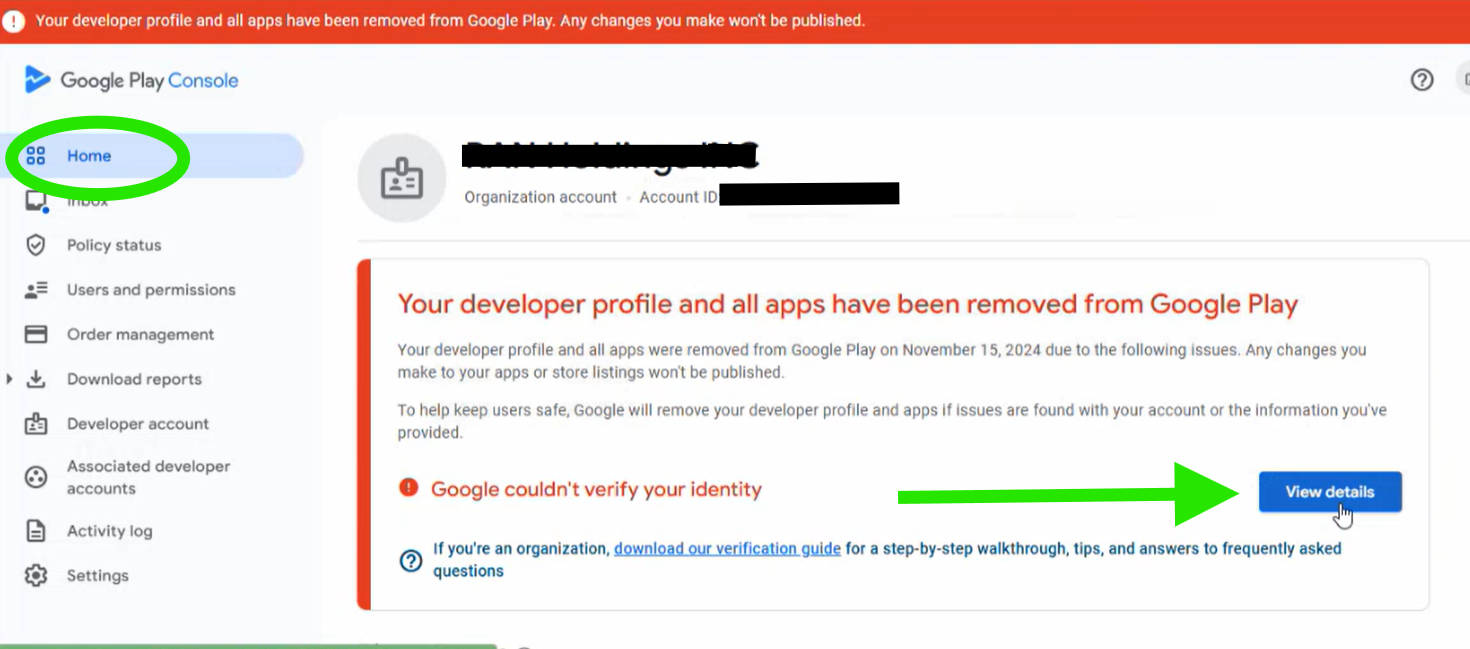
Login to play.google.com/console and select your account ...
Whether you missed the deadline or still have time, the process is essentially the same. You will see this screen. Click “View Details” ...
You can then click here ...
You also should have received an email from Google that looks like the screenshot below. You can click “Get Started” from here, too:
The next screen lists the sections you'll need to complete to verify your account. Click “Start” in the lower right corner:
Confirm your account type by selecting Organization account and then click “Next” ...
Select a payments profile and click Continue.
Important: If you have an organization account, you are required to enter your organization's D-U-N-S number as part of creating their payment profile. D&B D-U-N-S Number Lookup
Enter your DUNS number in the box and hit “Next” ...
Check that the payment profile details listed are correct and click Next. You will then see this screen ...
Review your profile information, check the box, and then click “Next” ...
On the next page, you will be asked to provide additional information ...
Organization type = Choose “Company or business”
Organization size = Select the # of employees in your business
Organization phone number = Enter your store phone number
Organization website = Enter your website
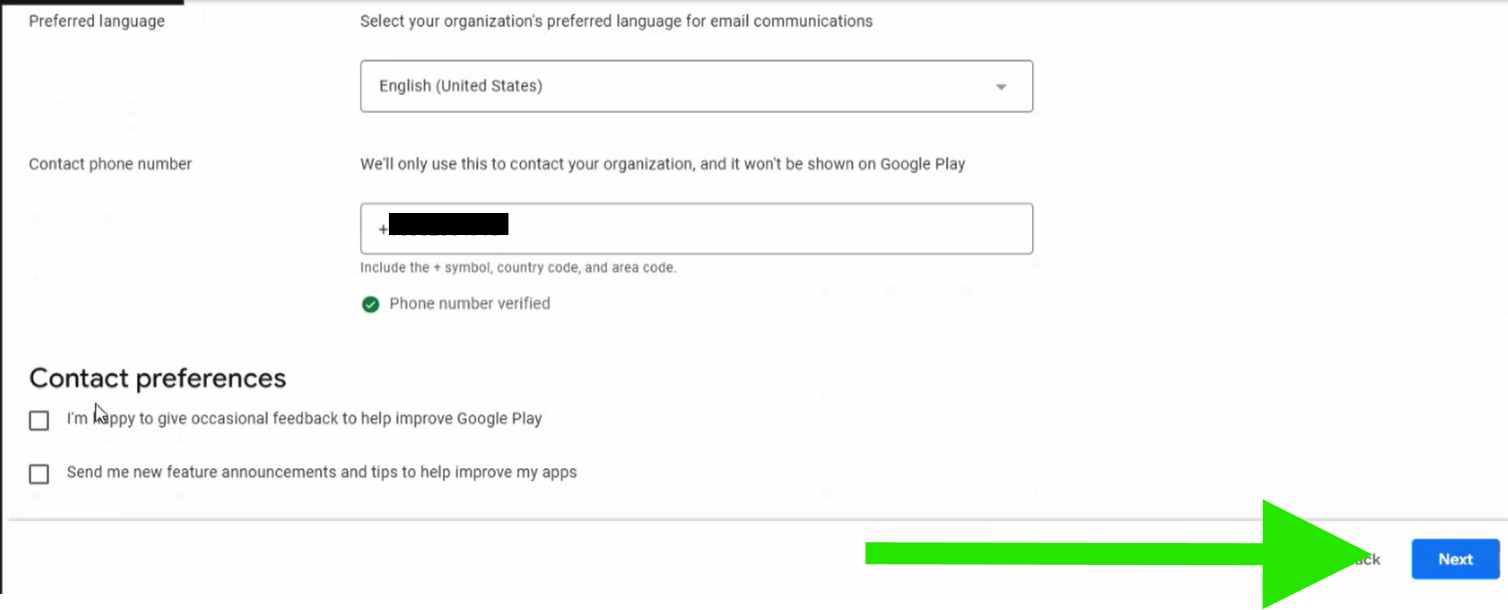
Click “Next” and on the next page, you will then need to enter the best contact email and phone number for Google to reach you. You will have to verify your phone number with a text message. Then click “Next” ...
On the next page, verify your phone number and the email address you used to set up the account.
On the next page, check the “I consent ...” box and hit Save ...
NOTE FROM PREVIOUS STEP: After doing the previous step, Google will say they cannot verify your identity. Go back to the home page and hit REFRESH on your browser ... you will see a notification that Google now needs to verify your identity. Click “View Details” ...
.
On the next page, click “Upload Document” ..
This is where you’ll need your Liquor License and ID ... click “Start Verification” ...
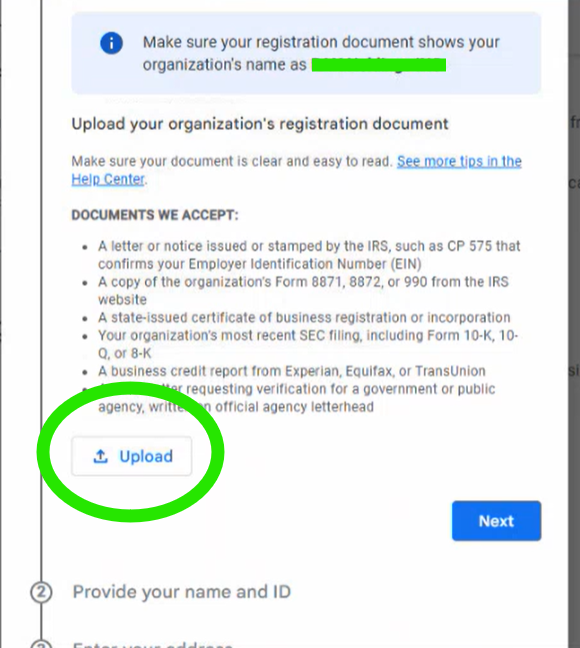
First, click “Upload” and add your Liquor License. Make sure all four corners are in the frame of the picture. Click “Next” ... (ON THIS STEP, GOOGLE SEEMS TO PREFER A PHOTO FROM YOUR CAMERA RATHER THAN A SCANNER)

Next, input your name, country, and ID type (select Driver License), then upload a picture of your ID (front and back) as instructed. Click “Next.”
Lastly, you’ll enter the address that matched your Driver License and click SUBMIT. That’s the final step and you will then see this screen ...
After you've provided the information required to verify your account, Google will review and process your submission. The account owner will receive an email when verification is complete. This may take a few days.
Related Articles
Google Play Console - Creating Your Developer Account
You'll need a Gmail account for this step, so if you don't have one at this time please make one then continue with the steps below. Go to PLAY.GOOGLE.COM/CONSOLE If you're signed into Google already you should come to a page that looks like one of ...Google Play Console - Account Verification
It is vitally important that you complete the steps below as quickly as possible to make sure your Android App does not fall off the Google Play Store. About a year ago, Google made some changes to how accounts are verified. Your account was created ...Google Developer Enrollment
You'll need a Gmail account for this step, so if you don't have one at this time, please make one then continue with the steps below. Go to PLAY.GOOGLE.COM/CONSOLE If you're signed into Google, already you should come to a page that looks like one of ...Creating Your Apple ID
Creating Your Apple ID Before you can upload an app to the App Store, you'll need to create an Apple ID for your store. Just like youare required to have one for your personal iPhone, your store will need a separate one to enroll in the Apple ...How to Accept the Latest Terms for Your Apple Developer Organization Account
Guide: How to Accept the Latest Terms for Your Apple Developer Organization Account Overview Apple periodically updates its Apple Developer Program License Agreement and related terms (e.g., Paid Apps Agreement) to reflect new policies, features, or ...